Unfortunately there’s always going to be a bane that someone has no matter how hard they try to avoid gluten. For my boyfriend, Sean, that bane is sushi. I think it broke his heart to find out that his favourite piece, the California roll, is less than gluten friendly. But his birthday is coming up and we haven’t yet run out of Beano. For such occasion, I’ve been trying to master the sushi roll.
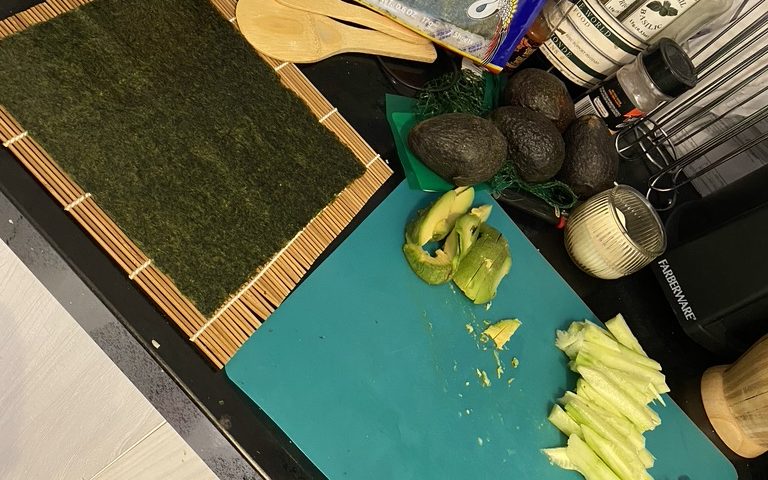
I picked up some imitation crab (it’s crab-flavoured fish and honestly that disgusts me, but I like the taste, so I’ll get over it). Unfortunately, it’s full of wheat additives. Boo. I also grabbed avocados (they’re much easier to handle than I thought they would be) and a cucumber so I can make cucumber rolls too.
I’ve had this idea in mind for a while, so I went onto Amazon and got a sushi rolling kit, prepped some minute rice with potato starch to make it glutinous.
This is my first real attempt at sushi, so just bear with me. I’ll be using jasmine rice on Saturday so it may turn out a bit different.
What you’ll need
- Cucumbers, peeled, quartered and sliced
- Avocados, peeled and sliced
- Imitation crab (optional)
- Glutinous rice, cooked and cooled (Jasmine works better but for this trial-and-error, I’ll be using minute rice mixed with potato starch)
- Nori
How do you do it?
Honestly, it’s overwhelming to think about but it’s ever so simple.
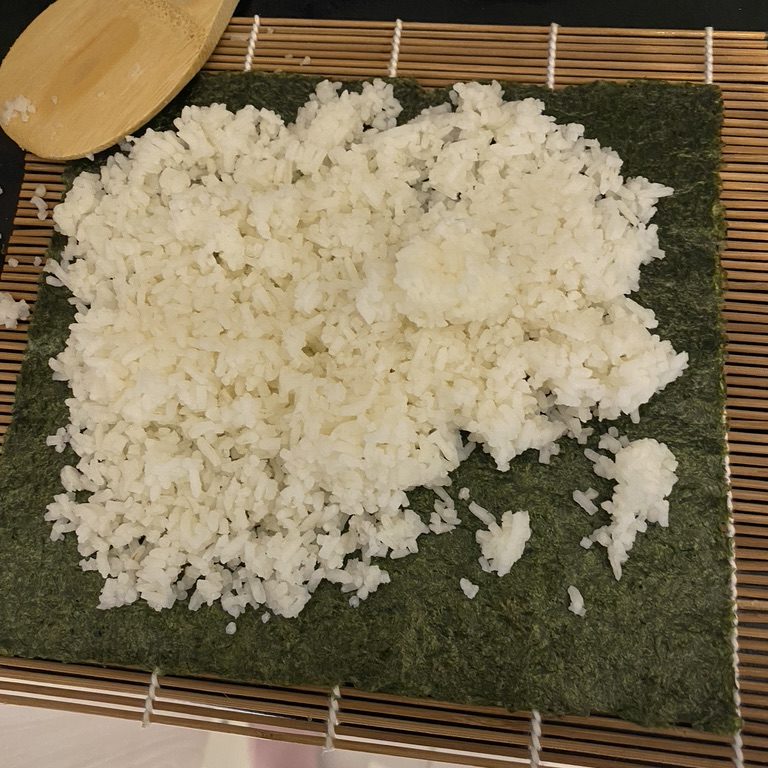

- Lay the seaweed square on a sushi roller (or parchment paper if you don’t have the roller).
- Spread and flatten the rice onto the seaweed using a wooden spoon.
- Carefully line the cucumber, avocado and, if you so choose, the imitation crab onto the rice with about half an inch of space between.
- Take one end of the roller/paper and gently coerce the seaweed onto itself so that it begins to make a roll.
- Continue slowly folding until the sushi has fully taken shape.
- Gently press down almost as if you’re sealing the sushi. Be careful not to press too hard.
- Unfold your rolling tool carefully and lay it flat.
- Transfer roll to a safe cutting surface
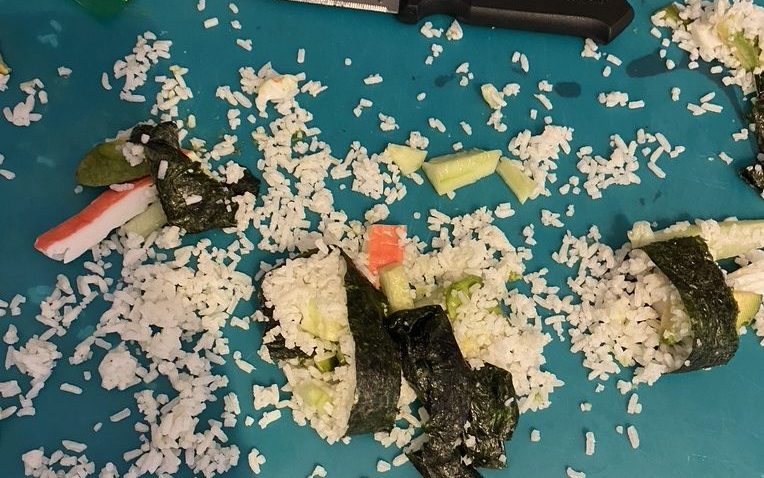
- Take a very sharp knife and cut into the roll, keeping each roll roughly the same size.
- Carefully separate the rolls. They will fall apart if not cut through.
- Keep cool until you’re ready to serve.

Results?
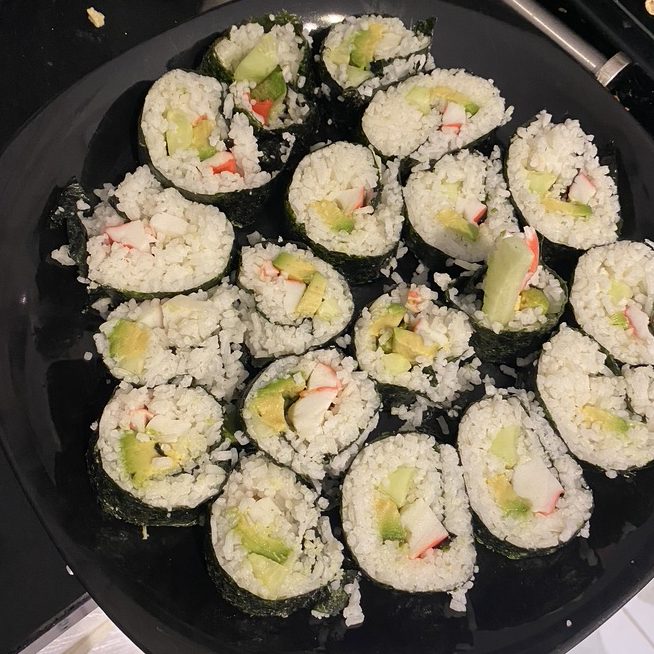
A bit messy but tasty. My son even asked for seconds, expressed disappointment that my next attempt would be with different rice and even more-so disappointed that he wouldn’t get any of Sean’s birthday dinner.
I would definitely recommend trying it out for yourself. I even used the scraps that fell apart to make a hand roll, as those are my favourite.
“Can I have some more? They’re really good!” – My son, a picky eater.
“They taste like they’re from the restaurant.” – my boyfriend, a California roll lover..
